Mask designer
1 Overview
The mask designer is an easy to use graphical tool to design user interfaces for a target system.
- Masks define the area for control or display elements and can be arranged in a hierarchical order.
- Text fields, bars, trend writers, buttons, lists, and other objects are placed within the masks and used to display conditions and values or to operate the system.
- The parameter dialogs of the masks and objects feature a large amount of configuration settings. Different colors, texts, pictures, and fonts can be assigned to the elements.
- Bitmaps, fonts and predefined texts can be manages as language dependent resources.
- Because the mask designer is supporting Unicode the user interfaces can be easily adapted to different languages.
2 User interface
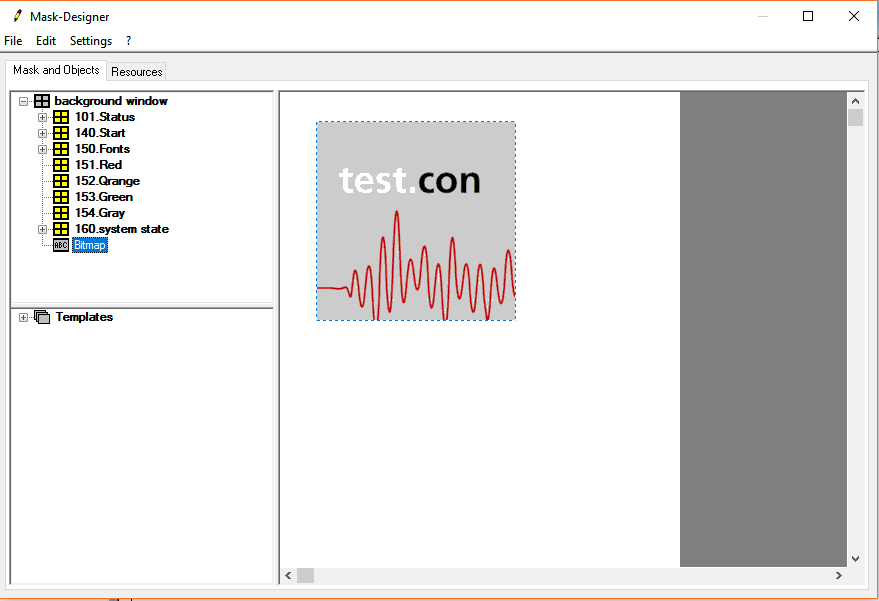
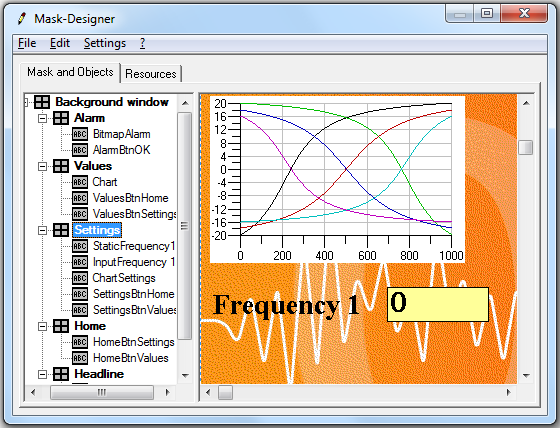
The mask-designer features two views. The first one is used to define the design tree of masks and objects. The background window is the starting point for all designs. Other masks and objects can be placed here and their properties can be set.

In the second view the resources are managed. These are the language dependant bitmaps, texts and fonts, used by masks and objects in the design.
The register cards below the menu are used to switch between the two views. The main menu and the context menus provide a large number of commands to edit the masks, objects and resources.
2.1 Menu
The main menu is used to get access to the common commands. It consists of four sub menus.
| Submenu | Content |
|---|---|
| File | · Import of masks and objects · Replace the current design by another configuration · Export of selected masks and objects |
| Edit | · Undo previous actions (Ctrl+Z) · Select All elements (Ctrl+A) · Cut all selected elements (Ctrl+X) · Copy all selected elements (Ctrl+C) · Paste copied elements (Ctrl+V) · Delete all selected elements (Del) |
| Settings | · With the menu item Designer … the zoom factor and the background color of the work sheet can be selected. · The Font … of the user interface can be changed. |
| ? | · This help can be invoked. · The version information about the mask designer can be called. |
The main menu offers only a fraction of all possible operations for masks, objects, or resources. The significant commands for the different elements can be found in the context menus. These operations are described in more details in the chapters Design user interfaces and Managing of resources.
3 Design user interfaces
Masks and objects are the foundation of the design of user interfaces. The objects implement the functions to display information or to interact with the user. The masks organize the different views and provide options for the background layout.
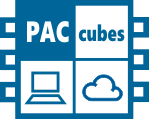
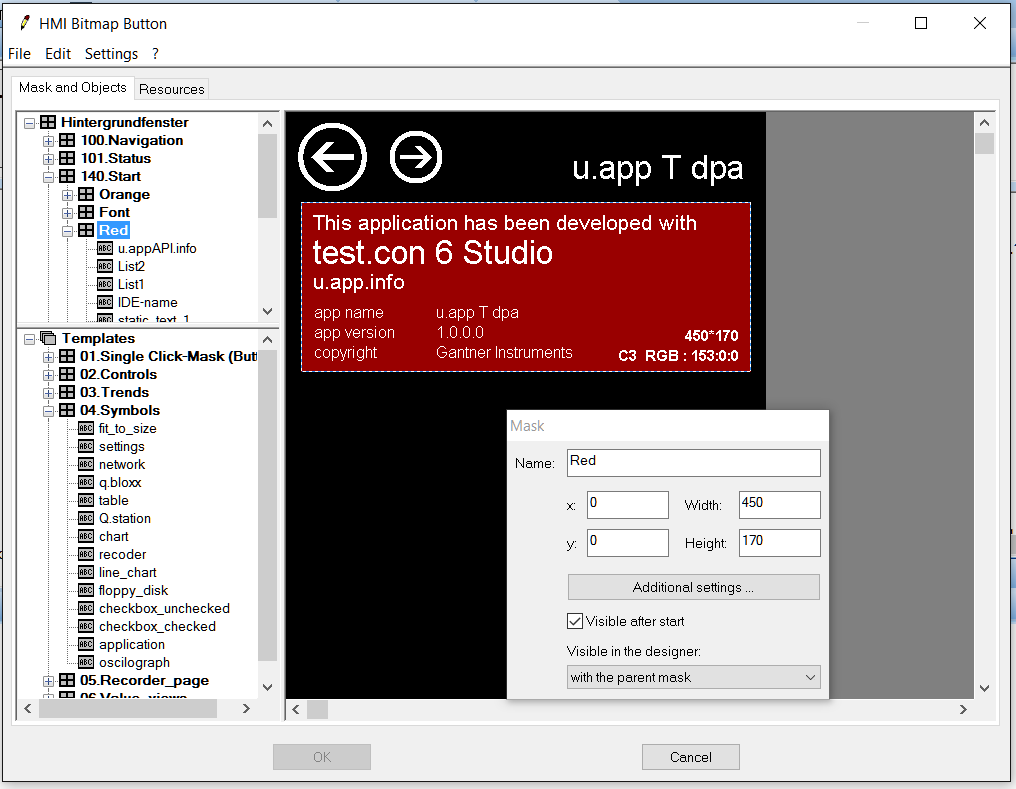
The view of the mask designer for dealing with masks and objects is divided into two areas. The left part is the design tree and the right part is the work sheet. Additionally the settings of the currently selected mask or object, like name, position, size or visibility, are displayed in a non-modal dialog. These settings can be edited here.
The root of the design tree is the background window. This is a specific mask, which can't be moved or deleted. The size of the background window defines the resolution of the display in the target system.
Within a mask other, subordinated masks and objects can be created by the context menu of the tree or the work sheet. Other commands can also be found there for copying or deleting elements or calling the parameter dialog for more settings.
3.1 Creation of new masks or objects
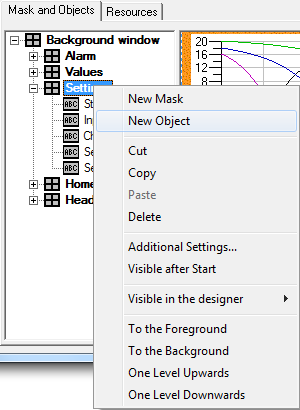
Within a mask other, subordinated masks and objects can be created by the context menu of the tree or the work sheet. Other commands can also be found there for copying or deleting elements or calling the parameter dialog for more settings.
The new mask or object is assigned to that mask, whose context menu was called. As a consequence a hierarchical structure is created. This has influence to the visibility of the objects.
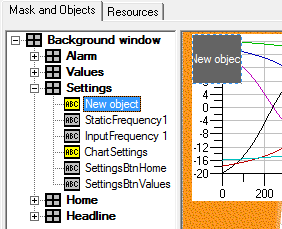
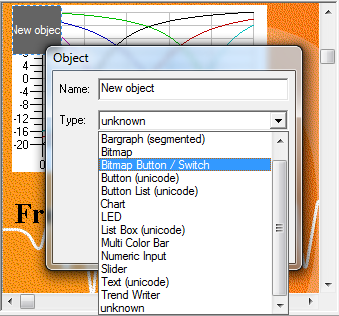
To be able to work with the new object, a type has to be selected in the object dialog. For any mask as well as for any object a meaningful and descriptive name should be given.
The specific properties of the elements can be set by the parameter dialog. This dialog is called by the button or by the context menu command "Additional settings …".
3.2 Position and size
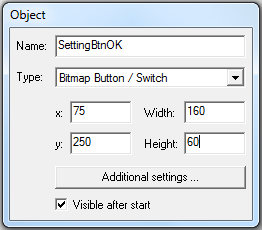
The position and the size of a mask or an object are set by the non-modal attribute dialog.
Alternatively it is possible to move, enlarge, or shrink an object or a mask directly in the work sheet by using the mouse. Clicking the left mouse button above a mask or an object will select it. When holding the mouse button and then moving the mouse, the selected element will be moved. When the mouse curser is above the edge of an element, it will show in which direction the size of this element can be changed by pressing and holding the mouse button and then moving the mouse in that direction.
3.3 Group operations for objects

Select
Within a mask it is possible to select several objects of that mask. To do so, the Ctrl key has to be pressed, when clicking objects with the mouse. The last object is highlighted by a surrounding dashed line in the system color for marked texts. The other objects are highlighted by a grey-black dashed frame.
It is also possible to select all objects with a rectangle. When pressing the left mouse button over a free area and holding the button while moving the mouse, a selection rectangle will be created. It will be depicted as a frame in the colors of the emphasized marking, because the standard frame and the inverted bitmaps are not visible when using dark gray. All objects completely within that rectangle will be selected after the mouse button is released. This selection is limited to one mask. If there is more than one mask visible, only the mask in the most foreground position with at least one object within the rectangle will be chosen. To start this kind of selection within a mask, the Ctrl or the Shift key has to be hold down together with the left mouse button. Without the additional key, the mask itself would be selected and moved.
When selecting multiple objects not only the Ctrl but also the Shift key can be used.
Undo selection
To unmark the selection of multiple objects just click on a single mask or object without holding the Ctrl or the Shift key or select a different element in the design tree. In doing so, the non-modal attribute dialog is available again. Additionally the selection of multiple objects will be undone by double clicking on any element, which will also open the parameter dialog.
It is possible to unselect single objects out of a group of selected elements by holding the Shift key and clicking again on an already selected object. Generally speaking any selection will be undone by clicking on a selected element while holding the Shift key.
Operations
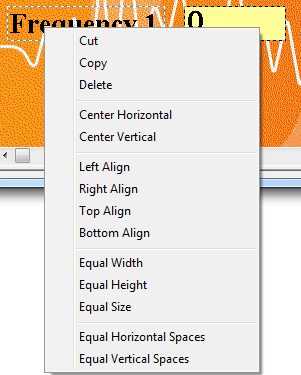
The specific highlighting of the last selected object within a selection of multiple elements indicates its specific relevance for operations available by the context menu of such a multiple selection.
When aligning the selected objects, the highlighted element defines the left, right, top or button edge, where the other objects will be arranged. It also defines the width and/or the height which will be assigned to the other objects when equalizing that parameter. The other context menu commands allow cutting, copying, or deleting all selected objects. It is also possible to center the objects horizontally or vertically regarding their mask or to arrange them with equal spaces between. The last mentioned commands can only be executed if at least three objects are selected. It is also possible to simply move all selected objects together by holding the left mouse button and move the mouse.
To change the specific highlighted object, simply hold the Ctrl key while clicking on one of the already selected objects.
3.4 Visibility
It has to be distinguished between the visibility in the work sheet of the mask designer and the visibility on the target systems display.
Visibility in the mask designer
For the display of the masks and objects in the work sheet of the mask designer the following rules will apply:
- A mask will be displayed, if the mask itself or at least one of its containing objects is selected.
- The setting of the property "Visible in the designer" of the attribute dialog or the context menu will influence the display of a mask:
- "Permanent" visible masks will always be displayed.
- "With the parent mask" means that the mask is displayed, if its parent mask is visible.
- "Only if mask is selected" means just that. In this case the first rule has to be matched.
- If a mask is visible, all its containing objects will be displayed, too.
A mask hides other masks, if it is further in the foreground, which means it is above the other mask in the design tree. It also hides another mask, if it is a sub mask (child mask). The visibility of objects depends only on their position in the foreground.
Visibility on the target system
For the visibility of masks and objects on the display of the target system other rules apply.
The setting "Visible in the designer" has no influence here. The display of masks and objects will be determined by the checkbox "Visible after start" in the attribute dialog. The visibility of an element can be changed during the program execution by its assigned HMI function block.
![]()
Masks and objects are only visible in the display of the target system, if their superior mask is displayed, too. The superior mask will also limit the area where its subordinate elements can be displayed. All parts of elements out of this area will not be drawn. To indicate possible problems these elements are highlighted yellow in the design tree.
Masks and objects at the same level will have a sequence order at the start of the application defined by the design tree. This order will be changed by switching on and off the visibility of the used objects. In this way hidden masks and objects can be brought to the foreground because of such visibility changes. The visibility of objects within the same mask will also be influenced, if they overlap each other. That’s why these objects will also be highlighted yellow in the design tree, if they are overlapping.
4 Managing of resources
Resources are the bitmaps, fonts and predefined texts used by the masks and objects. They can be addressed by two IDs. The first ID (0-9999) indicates the language and the second ID (0-65534) indicates the resources itself. Because there is also a default language, it is theoretically possible to refer to 65535 bitmaps, 65535 fonts and 65535 predefined texts in 10001 languages.
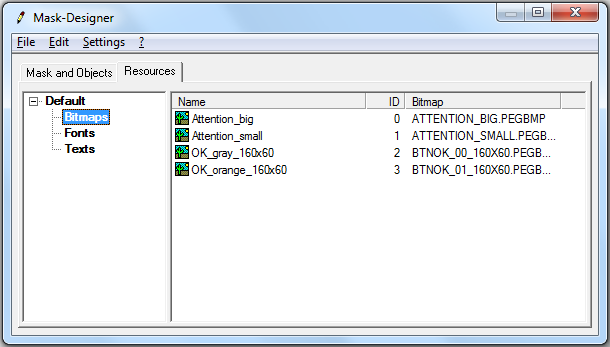
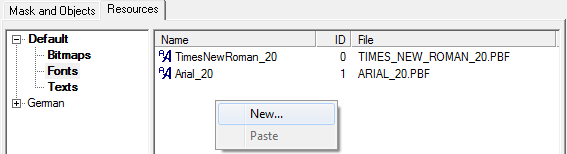
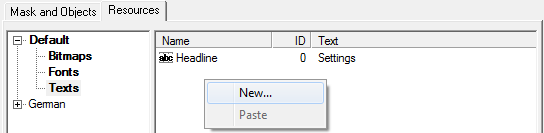
The view of the mask designer for handling the resources is divided into two areas. On the left side there is the tree where all defined languages are listed. For the default and every other language there exist entries for "Bitmaps", "Fonts", and "Texts". When selecting one of these entries, all items of that kind of resource will be shown on the right side of the view.
With the help of the context menus the language dependent resources for bitmaps, fonts and texts can be created and edited.
4.1 Default and language dependent values
Even in projects designed to support multiple languages only a part of the needed resources are really language dependent. Many of the bitmaps, fonts and even predefined texts don't need to be changed depending on the language. That’s why the mask-designer supports the uses of default values. These values are assigned to the default language. Because a default value for every bitmap, every font and every text exist, the other languages need only their specific values. If no specific value for a specific language is defined for a resource, the default value will be used automatically. In this way, not only the editing of resources is easier but also the needed memory in the target system is reduced.
Within the lists of the default language, new resources can be created with the context menus. They are used as default values. This is not possible for the other languages. For the other languages only specific, language dependent value can be assigned to existing resources. Whether an element of a (non default) language is using a default or a specific value can be seen in the symbol in front of the name. A link symbol indicates a default value, while an icon for bitmaps, fonts or texts indicates a specific value.
Deleting an item from a list is only possible within the default language. With the command in the context menu the default and all language specific values of that resource will be deleted. If only the language dependent value should be removed, then the command "Reset" from the context menu in the list of the selected language has to be used. Delete, reset and all clipboard operations can also be executed on multiple selected elements.
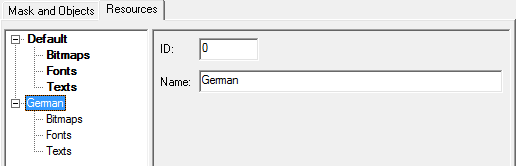
4.2 Languages
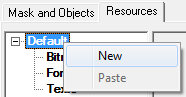
New projects normally start with only the default language. But it is easy to add other languages with the context menu.
If another language than the default language is selected, an input mask is shown on the right side. A new ID and another name can be assigned here. Both values have to be unique.
The context menu for the languages can be used to copy entries of the tree from or to the clipboard or to delete entries.
4.3 Bitmaps
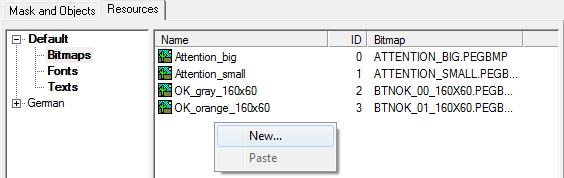
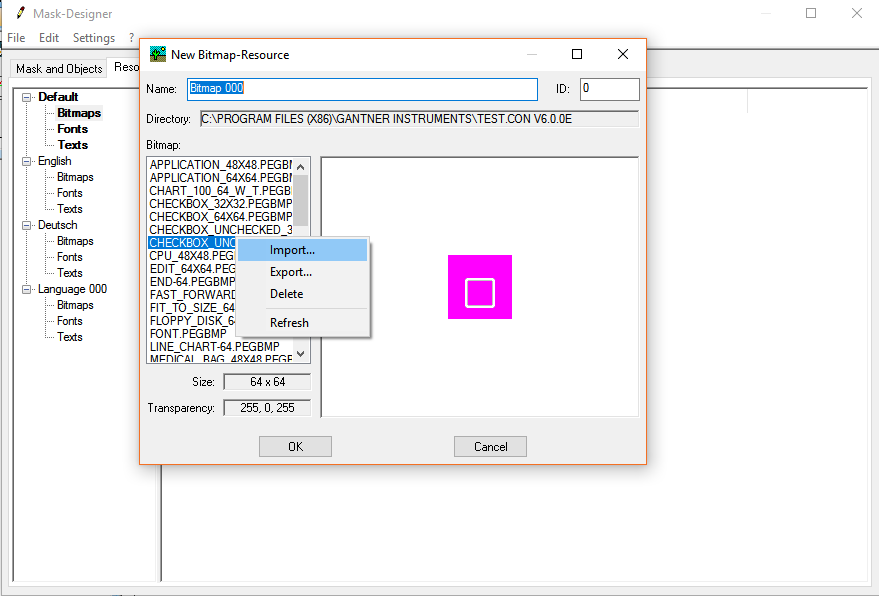
Create
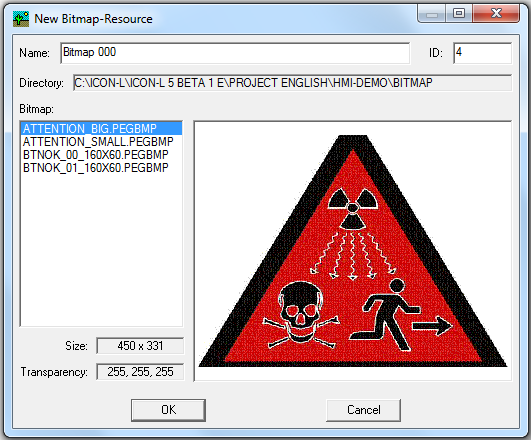
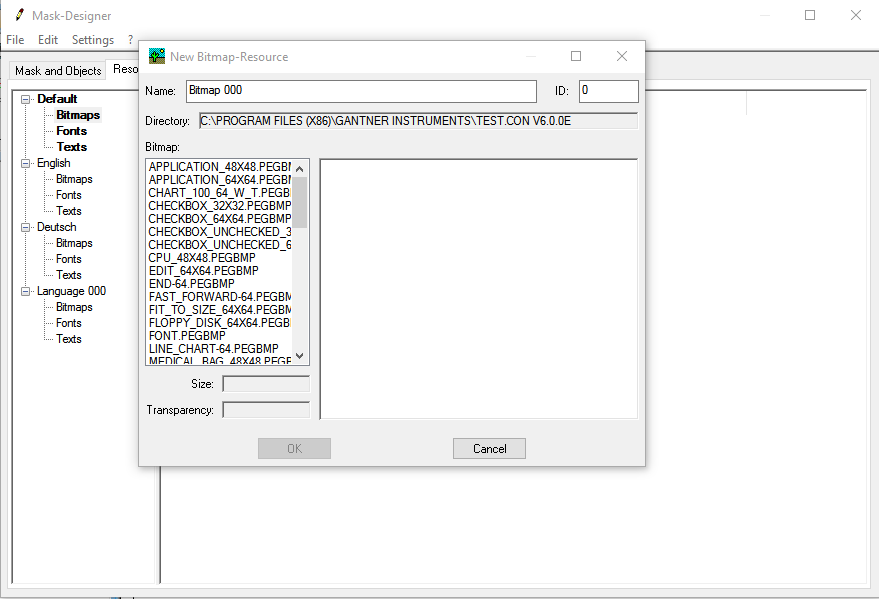
A new bitmap resource will be created by the command "New" from the context menu. After calling this command the parameter dialog for bitmaps opens.
A specific bitmap file (PEGBMP) is assigned to the bitmap resource. These files are stored in the BITMAP directory of the project. This specific data format is used by the implemented graphic library for the target system. All existing PEGBMP files are listed on the left side. When selecting one of the files a preview image is shown on the right side. Under the file list the size and the transparency color of the selected image is shown. The size of the dialog as whole can be changed to give more room for the preview image, so it can be displayed in full resolution.
When handling default values, a new unique name and a new unique ID can be assigned.
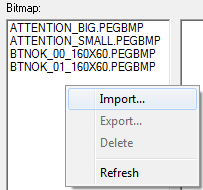
Import/Export
Using the context menu of the file list additional pictures can be imported by converting from standard windows bitmap format (BMP) or the existing pictures can be exported to the windows bitmap format or can be deleted.
After calling the import command a new dialog will open. Here the source BMP file has to be specified. The file can be selected by opening the file dialog with the browser button. Taking the name from the BMP file, a new name for the PEGBMP file will be suggested. This name can be changed at will. Additionally a transparency color can be selected. After pressing the OK button, the picture will be converted. Because only 256 standard colors are supported sometimes the original colors have to be adapted. If this happens a message will be given at the end of the conversion process.
When exporting an existing picture, the user is asked to input a new name for the BMP file via a file dialog. The new file will be created into the selected directory. If the user wants it, the new file will be displayed in the assigned standard bitmap viewer.
Edit
By double clicking on an existing bitmap resource or using the context menu command "Edit", the parameter dialog will open with all parameters of that resource.
4.4 Fonts
Create
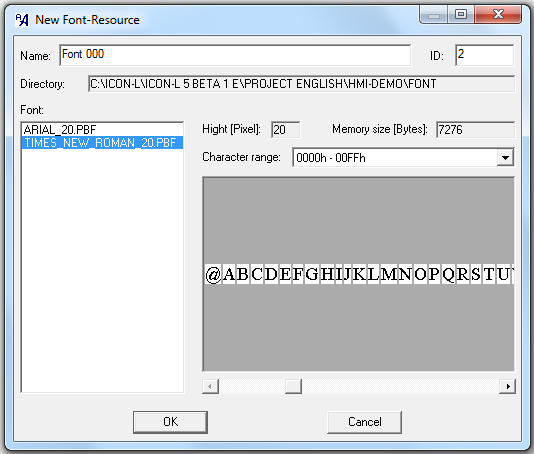
A new font resource will be created by the command "New" from the context menu. After calling this command the parameter dialog for fonts opens.
For the font resources a font file (PBF) has to be specified. On the left side all PBF files from the FONT directory of the project are listed. These files contain bitmap fonts in a specific format used by the implemented graphical library. After selecting one of the files from the list, a preview of that font will be shown on the right side in the preview area. If several character ranges exist the user can switch between them by using the drop down list above the preview area. This will change the display of the preview. The complete content of one PBF file is assigned to one font resource. The height of the characters and the necessary memory size for that PBF file in the target system is shown, too.
When handling default values, a new unique name and a new unique ID can be assigned.
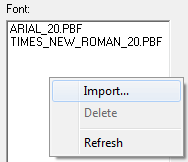
Importieren
Mit der rechten Maustaste über der Dateiliste öffnet man das Kontextmenü, mit dem weitere PBF-Dateien durch Konvertieren von Schriftarten importiert oder vorhandene Dateien gelöscht werden können.
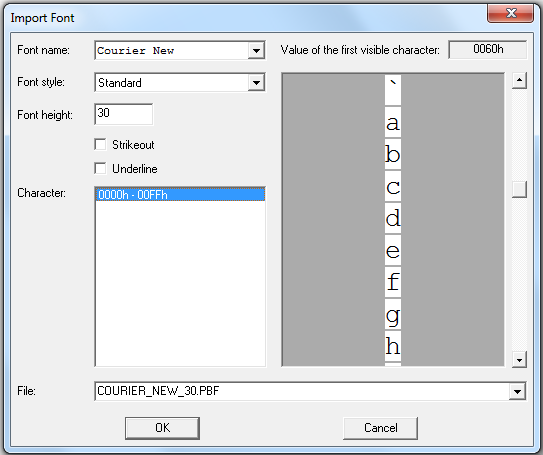
After calling the import command the import dialog will open. Here one of the existing fonts can be selected to be converted. The top most drop down list contains all fonts installed on the PC. Additional properties like font style (i.e. bold or italic), height, strike out or underline can be selected. To save memory or to add specific characters (i.e. for other languages) the character range can be shortened or stretched. The commands for this can be found in the context menu of the list area "Character". Finally the suggested name for the new font can be changed. After pressing the OK button, the font will be converted and a new PBF file will be created.
Edit
By double clicking on an existing font resource or using the context menu command "Edit", the parameter dialog will open with all parameters of that resource.
4.5 Texts
Create
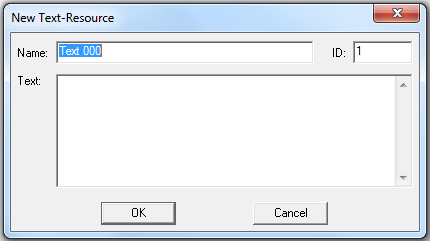
A new text resource will be created by the command "New" from the context menu. After calling this command the parameter dialog for texts opens.
Text resources contain beside the name and the unique ID a predefined text with up to 2048 characters. Line breaks are allowed.
Edit
By double clicking on an existing text resource or using the context menu command "Edit", the parameter dialog will open with all parameters of that resource.
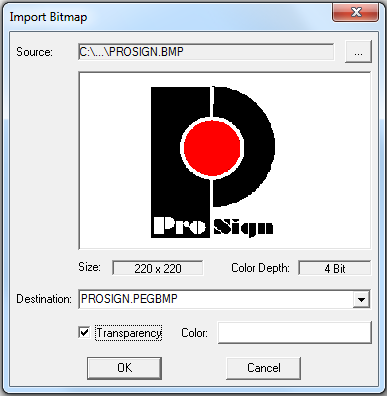
5 Import own Bitmap
To import your own Bitmap, the resource tree is opened in the Mask Designer.

By right clicking in the right field of the mask designer, the context menu is opened. Select „New..“.
By right clicking under the bitmap list, the context menu opens and with the command “import..”, another window will open.
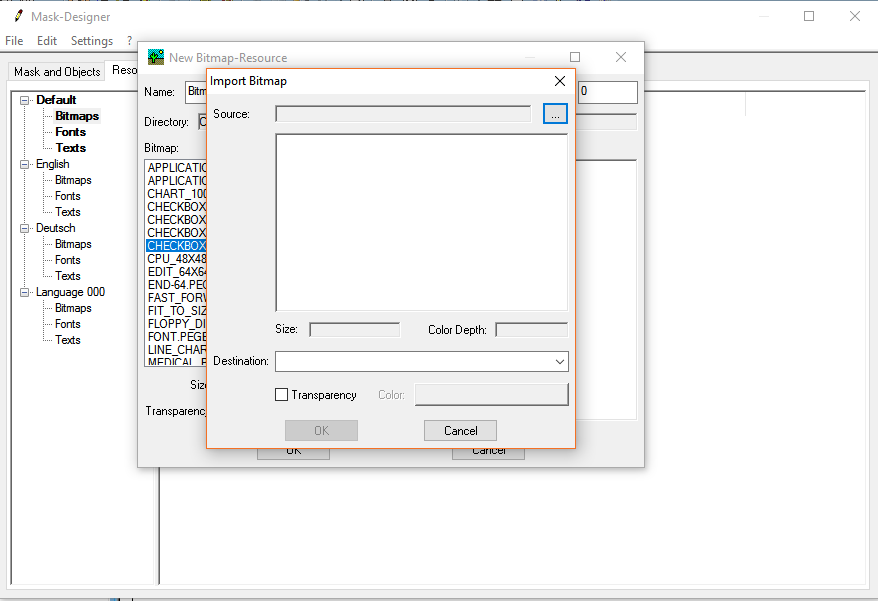
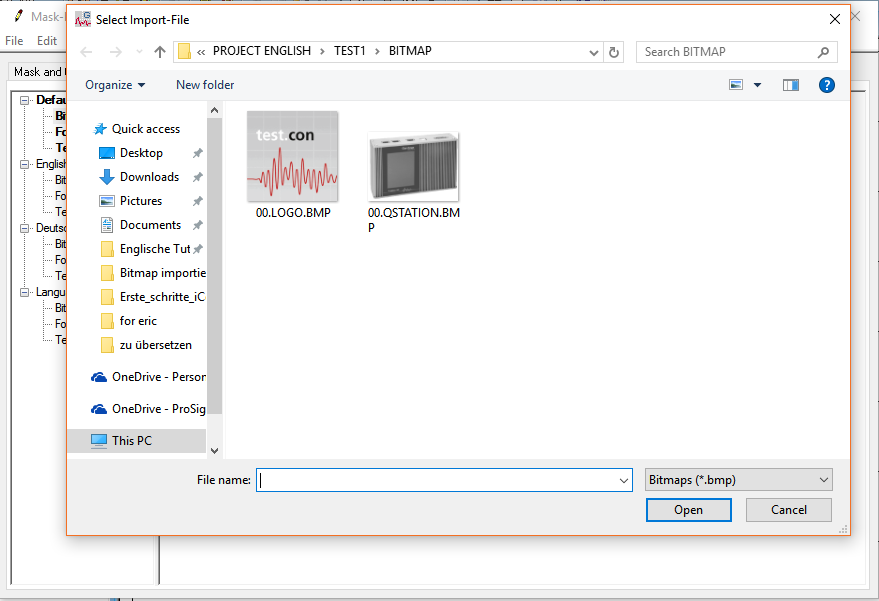
In the right upper section, there is a „search button“, with which you can search for the desired image.
After selecting the image, a transparency can be selected if required. A transparency for color x means, that all sections with color x will be transparent. As the image format is bitmap, it might occur, that color gradients complicate working with transparencies.

Subsequently, you can accept with “OK” and assign a unique and precise name to the image.
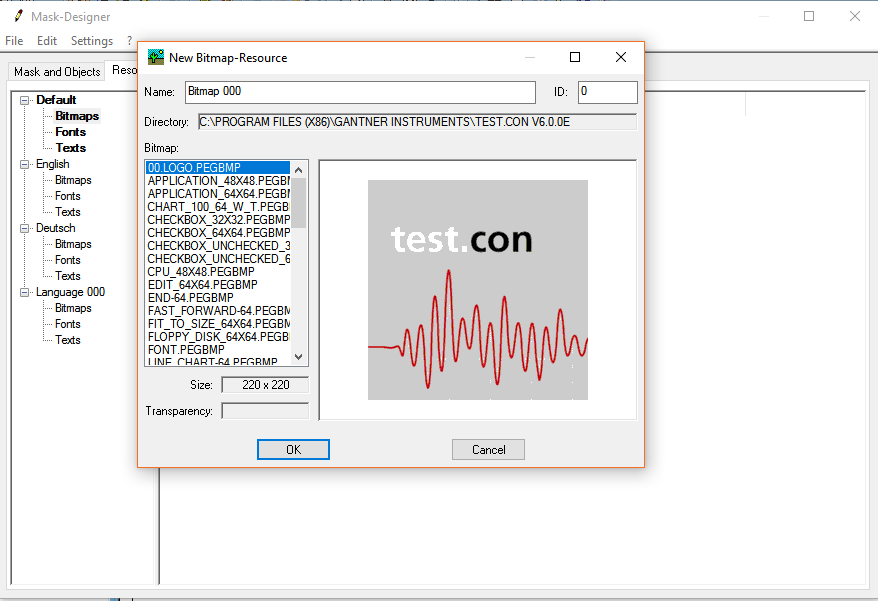
When the bitmap has been imported, it can be used in the mask designer.
When changing the image, it is automatically changed in all applied spaces.