Installation and First Steps
2 Connect PACcubes Station with PC
3 Assign an IP address to the PC (under Windows 10)
If the video does not work, you can click here to watch.
1 Software download and setup
You can find the latest version of test.con, test.con runtime as well as test.con studio in the Downloads section.

1. Save zip file
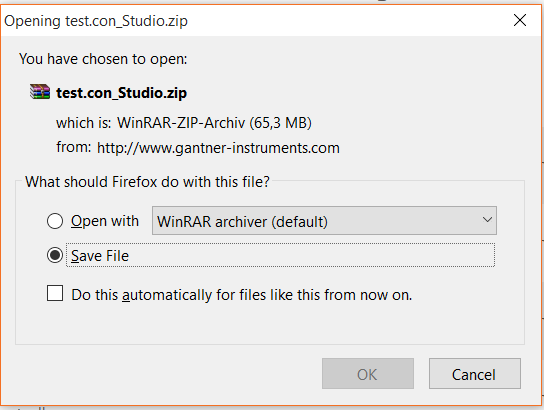
2. Open download folder and unpack file (f. e. with WinRAR)
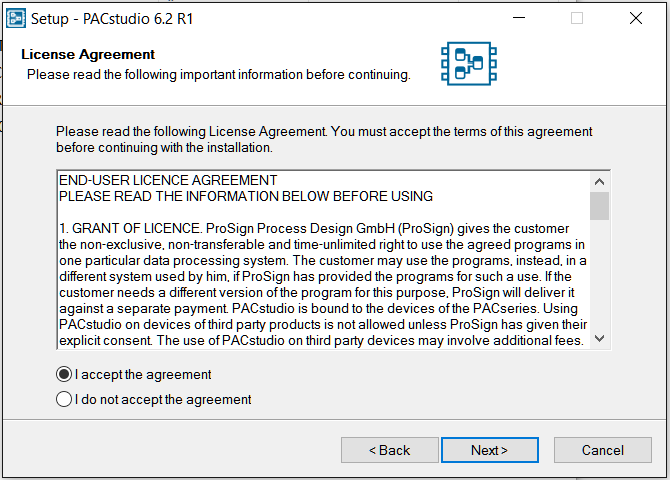
3. Execute Setup.exe

4. Accept license agreement
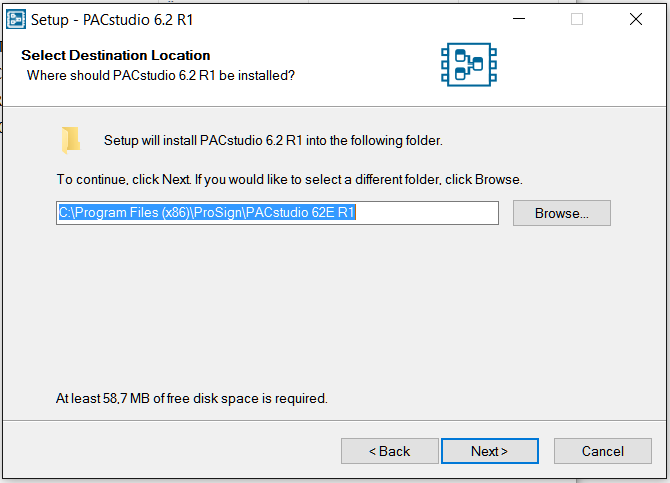
5. Choose directory
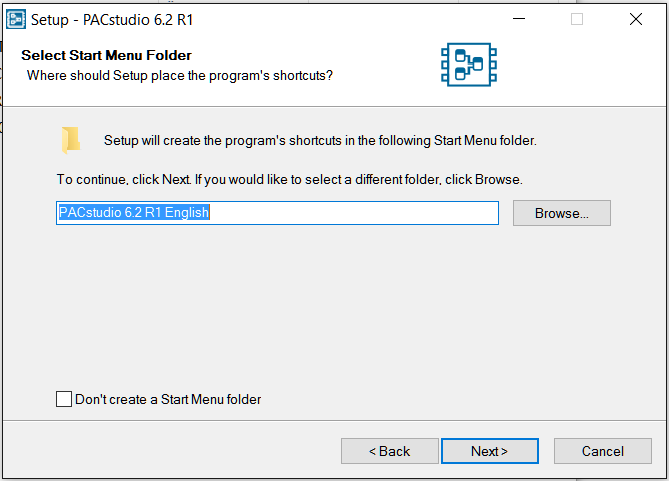
6. Select Start Menu Folder
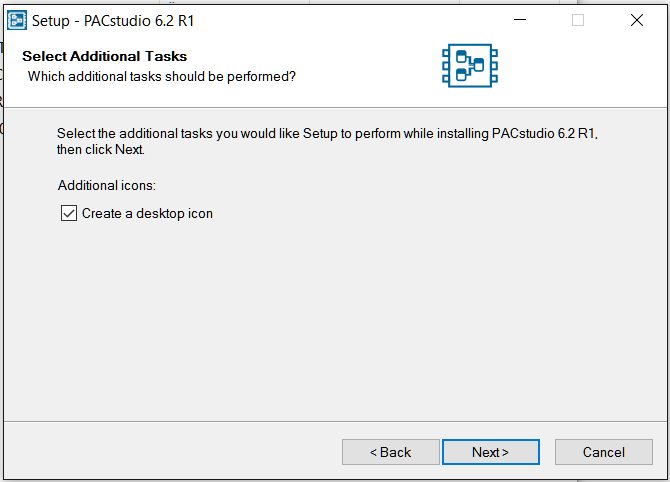
7. Select Additional Tasks
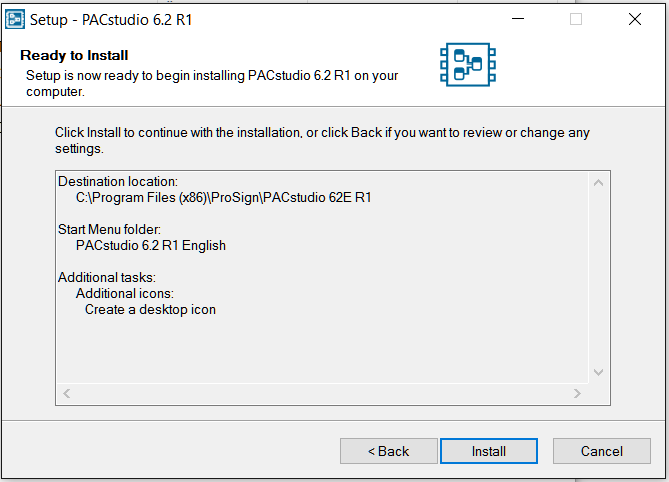
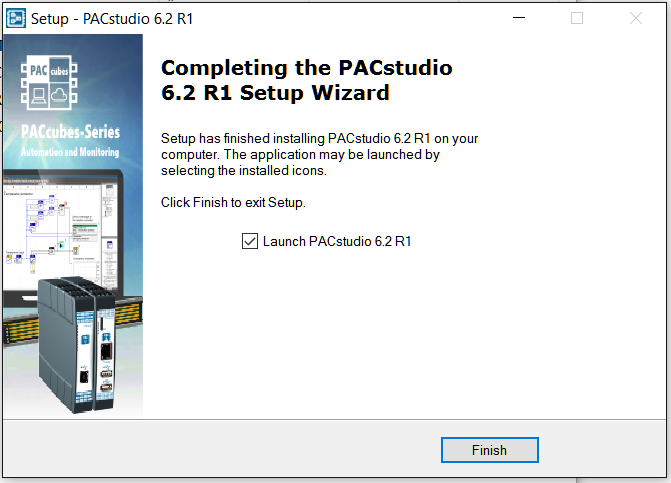
8. Install application
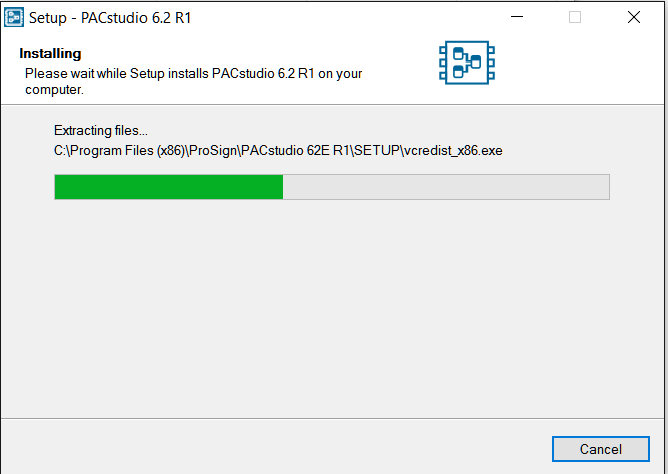
9. Installation is processing
2 Connect PACcubes Station with PC
The PACcubes Station is either connected to the PC using a DHCP server or it is connected directly to the PC. It is recommended to connect the PACcubes Station via DHCP server (router or switch), as IP addresses are assigned automatically that way.
2.1 Over a DHCP server
1. Connect PACcubes Station with network (switch or router) via Ethernet cable.
2. The PACcubes Station receives a valid network address from the server over DHCP.
3. The PC also automatically receives an IP address, when implemented in the same network.
4. Open PACstudio and make a connection between PACcubes Station and PACstudio as described in "3 Assign an IP address to the PC (with Windows 10)".
The Dynamic Host Configuration Protocol (DHCP) is responsible for assigning a free IP address in the network.
2.2 Connect PACcubes Station directly with the PC without network connection
The IP address of the PC has to be in the same address range as the IP address of the controller. That means that the first three blocks have to be the same and the last three numbers are variable. Choose a free IP address. The static IP address of the PACcubes Station is 168.200.11.
If it is not possible to make a connection with a server network or if there is not network at all, there is the possibility to directly connect the PACcubes Station to the PC over Ethernet cable.
1. Connect PACcubes Station with the PC over Ethernet cable
2. Assign an IP address to the PC in the address range 192.168.200.xxx
3 Assign an IP address to the PC (in Windows 10)
If there is a network and the PACcubes Station is connected, it is not necessary to manually assign an IP address to the PC. The DHCP server automatically assigns IP addresses to the PACcubes Station and the PC.
If there is no network connection with a DHCP server, and the PACcubes Station is directly connected to the PC, the PACcubes Station falls back to the static IP address 192.168.200.11. The PC itself must have an IP address in the same range, so the PC can identify the PACcubes Station. That means the address has to be as following: 192.168.200.xxx.
Below, the description on how to assign an IP address to a PC in Windows 10.
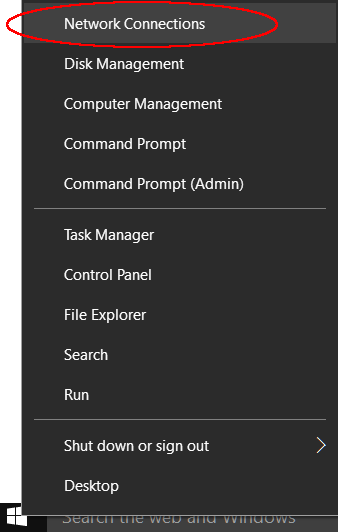
1. Right click on the Windows symbol
2. Select „Network Connections“
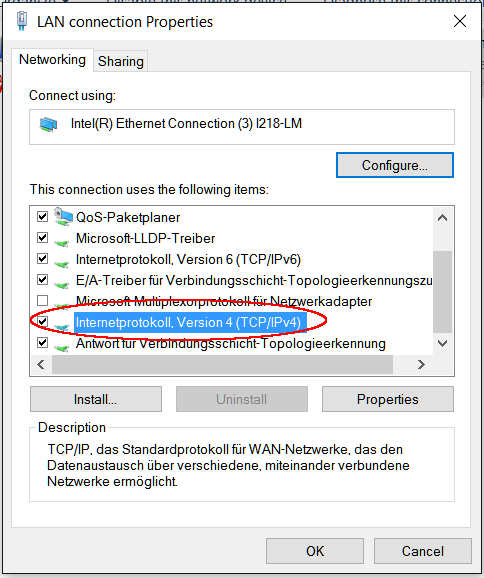
3. Right click on the corresponding Ethernet input

4. Select „Properties“
5. Select „Internet protocol, Version 4 TCP/IPv4)“ and „Properties“
6. Type in a free IP address: f.e. 192.168.200.25
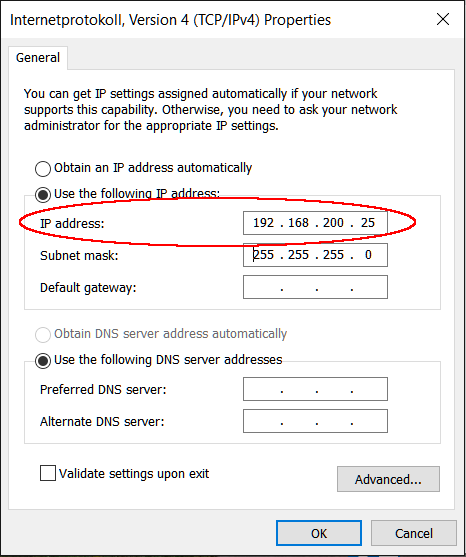
The IP address of the PC has to be in the same address range as the IP address of the controller. That means that the first three blocks have to be the same and the last three numbers are variable. Choose a free IP address. The static IP address of the PACcubes Station is 168.200.11.
4 Connect PACcubes Station with PACstudio
1. Call PACStudio
2. Create a new project, assign a name (here: FIRST_PROJECT) and click "OK"

3. Click on “Logon to target system” in the toolbar ![]()
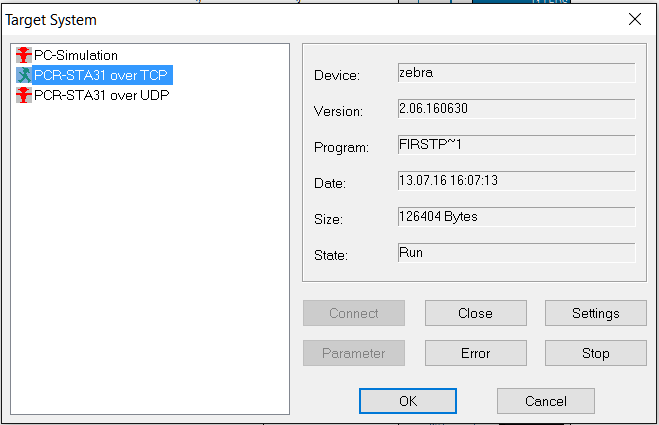
4. Select protocol/target system:
- PC simulation
The application can be tested without a controller
-
PCR-STA31 over TCP
The Transmission Control Protocol (TCP) is a reliable, connection-oriented and packet-switched transport protocol in computer networks. A secure connection is more important than a fast transfer of data packet.
- PCR-STA31 over UDP
The User Datagram Protocol (UDP) is a minimalistic, connectionless, unsecured transfer protocol. The main focus is a fast transfer of data packets.
5. For the example: select PCR-STA31 over TCP

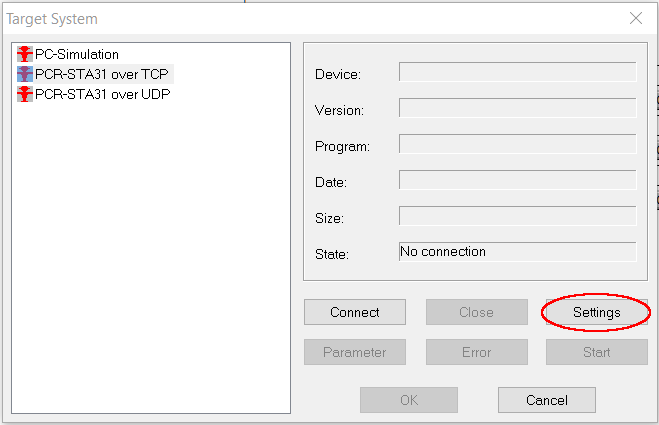
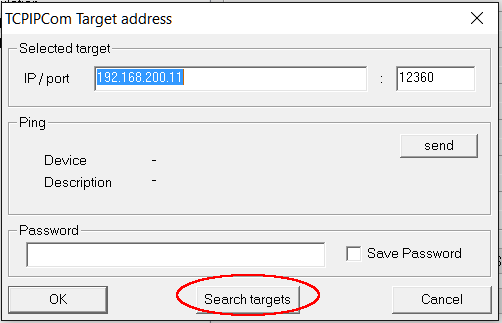
6. „Settings“: Here you can type in the IP address of the PACcubes Station (when directly connecting with the PC, the IP address is 192.168.200.11). If you do not know the IP address, select “Search targets”.
7. All available PACcubes Stations and I/O modules are listed here.
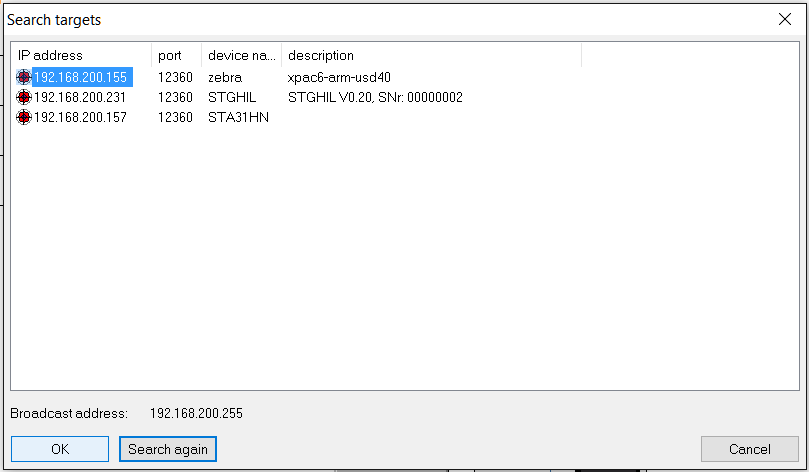
8. Select the desired controller and accept with „OK“.
9. Click on „Connect“
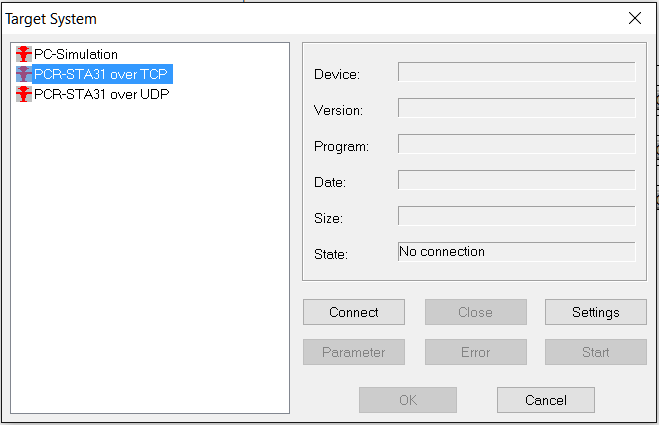
10. Controller is online now
11. Signs and Symbols
| Symbol | System state |
| No connection | |
| Active connection | |
| Connection not used |
12. When the PC simulation is running, you can see an ongoing counter (in s) down right in the status line. Furthermore you can see the icon ![]() in the Windows menu bar. It shows that the controller is in online state.
in the Windows menu bar. It shows that the controller is in online state.
![]()
5 User interface
The user interface of the software PACstudio has the following structure:
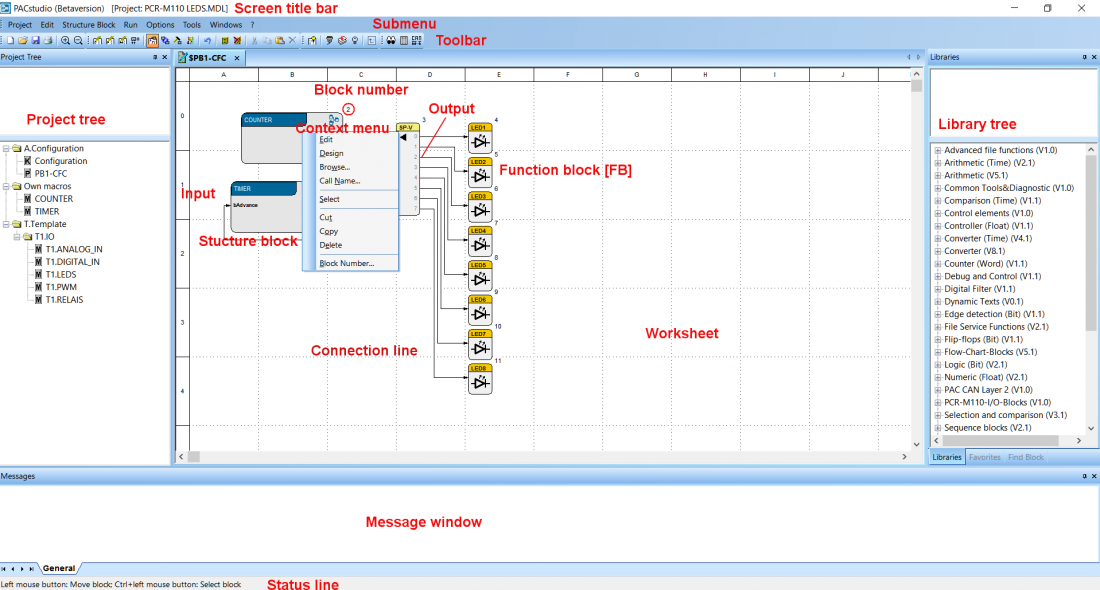
Commands can be called from the submenus, toolbar, context menu (right click) and key combination.
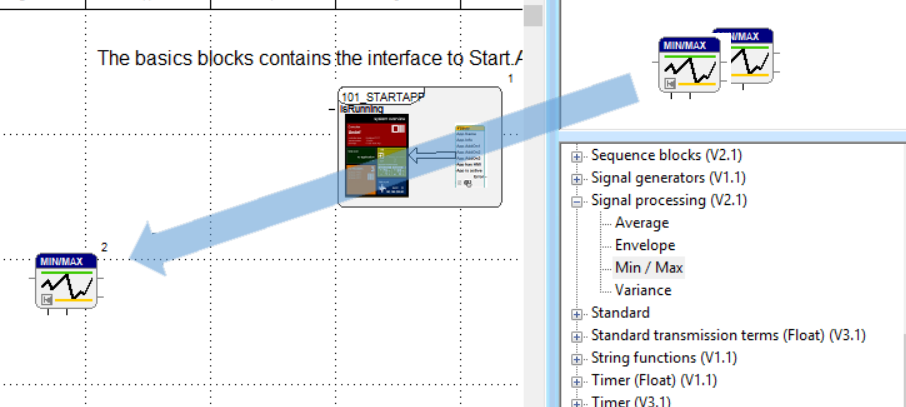
Function blocks are located on the right in the library tree and can be implemented on the worksheet by drag&drop.